


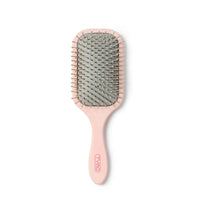
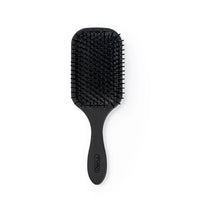



A smooth, bouncy blowout at home is easier than you might think. With a blow dryer brush and a few simple techniques, you can dry, smooth and shape your hair without juggling a hair dryer and round brush.
A blow dryer brush combines heated airflow with a brush, allowing you to dry and style at the same time. You may also see it called a blow dry brush, hair dryer brush, hot air brush or blowout brush.
So, how do you use a blow dryer brush? Start with damp, detangled hair, apply heat protectant and divide your hair into manageable sections. Then guide the brush slowly from roots to ends, using gentle tension to smooth the hair and create shape.
The small details make the biggest difference. Lifting the brush at the roots creates volume, while rotating it at the ends gives your blowout a soft, polished finish.

How to Use a Blow Dryer Brush: The Quick Version
Here is the whole process at a glance:
- Start with damp, detangled hair, not soaking-wet hair.
- Apply a heat protectant from roots to ends.
- Divide your hair into small, manageable sections.
- Choose a heat and airflow setting that suits your hair.
- Place the brush underneath the section and create gentle tension.
- Lift away from the scalp at the roots for volume.
- Slowly move the brush through the lengths while rotating it slightly.
- Shape the ends inward, outward or straight depending on the look you want.
- Finish drying the section before moving on.
- Let the finished hair cool before brushing through or adding finishing product.
Pro Tip: Take your time with each section. One slow, steady pass usually gives a smoother result than several quick ones.
What Is a Blow Dryer Brush?
Think of a blow dryer brush as a hair dryer and round brush in one. Heated air dries the hair while the barrel and bristles create the tension needed to smooth and shape it.
A thermal brush may look similar, but it does not blow air and should be used on dry hair. If you regularly style from damp hair, air dryer brushes can make the routine much simpler.
Use one when you want to:
- Dry and style damp hair at the same time
- Add volume at the roots
- Smooth the lengths
- Reduce the amount of juggling required with a dryer and round brush
- Create soft bends or flipped ends
- Build a fuller, salon-inspired blowout shape
Not sure which brush fits your routine? See our guide to thermal brushes vs blow dry brushes.
| Tool Type | Airflow vs Heated Barrel | Hair Condition | Primary Styling Goal |
|---|---|---|---|
| Blow Dryer Brush | Heated Airflow + Bristles | Damp Hair (Towel-dried) | Drying, root volume & bouncy blowout |
| Thermal Brush | Heated Ceramic/Tourmaline Barrel | 100% Dry Hair | Smoothing, touch-ups & soft waves |
| Traditional Dryer + Round Brush | Separate Airflow & Manual Tension | Damp Hair | Salon styling (requires two hands & coordination) |
How to Use a Blow Dryer Brush Step by Step
Step 1: Start With Damp, Detangled Hair
Start with damp hair, not soaking-wet hair. A dryer brush can remove moisture, but it works more efficiently once the excess water is gone. Gently squeeze out water with a towel. If your hair is still dripping, let it air-dry for a few minutes or use a regular dryer to remove some of the moisture first. It should still feel damp enough to reshape with the brush.
Detangle before you start. Pulling a heated brush through knots slows you down and puts extra tension on the hair.
Got thick or long hair? Rough-drying first will cut your styling time in half.
Step 2: Apply Heat Protectant and Styling Products
Apply heat protectant before you start styling. Keep everything else light. Too much mousse, cream or oil can weigh down the finished blowout. Choose your prep based on the finish you want:
- For more lift: Apply a lightweight volumizing mousse or root spray.
- For a smoother finish: Work a small amount of smoothing cream through the mid-lengths and ends.
- For frizz-prone hair: Use a lightweight anti-frizz product that will not leave it heavy.
Step 3: Section Your Hair
Trying to style too much hair at once usually leads to damp spots and uneven results. Clip the upper layers out of the way and begin underneath, then work your way up. Use smaller sections if your hair is thick or dense.
A section should sit comfortably on the brush without covering the whole barrel. If it is too large, the surface may dry while the hair underneath stays damp.
Step 4: Choose the Right Heat and Airflow
Start with the lowest setting that dries your hair effectively. Fine, fragile or damaged hair usually needs less heat. Thick or coarse hair may need a higher setting, more airflow or smaller sections.
Adjust the setting as you go. The hairline is often finer than the hair at the back, so it may need less heat.
Step 5: Start at the Roots
Place the brush underneath your first section, close to the roots. For more lift, guide the section up and away from the scalp instead of pulling it straight down. Pause at the roots for a moment, then move through the section with light, steady tension. There is no need to pull hard; the brush should grip the hair without tugging.
Step 6: Slowly Work Through the Lengths
Guide the brush slowly from the roots through the mid-lengths. Keep the hair spread evenly across the brush and turn the barrel slightly as you move. If the section still feels damp, slow down. One thorough pass is better than going over the same hair again and again. Keep the speed and tension steady from roots to ends.
Step 7: Shape the Ends
What you do at the ends determines the final shape. Turn the brush inward for rounded ends, or turn it outward for a flipped finish. For straighter ends, hold the brush more vertically and guide it straight through.
Want more bounce? Hold the ends around the brush for an extra moment before releasing them.
Step 8: Let the Hair Cool
Let each section cool for a few seconds before touching it. That short cooling time helps the shape settle. Once you have finished your whole head, loosen the style with your fingers and add a small amount of finishing product if you need it. Avoid brushing everything out straight away, or you may flatten the volume you just created.
Watch: How to Use a Blow Dryer Brush for the Perfect Blowout
Watch the Blowout Technique in Action
Prefer to watch the technique? In this tutorial, Glam Girl Gabi uses the TYMO VOLUMIZER to show the full process, from prep and sectioning to the finished blowout.
Watch how she keeps the brush moving and gently turns it through each section. She also makes sure the hair is completely dry before releasing it, which helps keep the finish smooth.

TYMO VOLUMIZER
How to Use a Blow Dryer Brush for More Volume & Soft Bends
If your hair looks smooth but still falls flat, the roots are usually the place to fix it. Once you have the technique down, explore these natural blowout hairstyles for more styling inspiration.
Place the brush under the section and lift upward before pulling through. At the crown, direct the hair forward or straight up as you dry it for extra lift. Do not drag every section down from the scalp; you will smooth the hair, but you will also flatten the roots.
For a little more lift at the crown:
- Take a smaller section at the top of the head.
- Lift it away from the direction it naturally falls.
- Position the brush underneath the roots.
- Dry the roots first.
- Keep the section lifted as you move through the lengths.
- Let it cool before letting it fall back into place.

How to Get a Smooth Blowout Without Frizz
Frizz does not always mean you need more heat. It often comes from sections that are too large, uneven tension or hair that is still damp when you release it. To keep the finish smoother:
- Detangle fully before you begin.
- Keep each section small enough to fit comfortably on the brush.
- Use steady tension from roots to ends.
- Move slowly enough to dry the section in one or two passes.
- Turn the brush gently instead of dragging it repeatedly through the hair.
- Use the lowest heat that works for your hair.
- Do not release a section until it is dry.

How to Create Soft Bends and a Bouncy Blowout
A bouncy blowout is more about shape than tight curls. As you reach the lower half of the section, begin turning the brush while keeping light tension on the hair. Turn the ends inward for a classic rounded finish. For more movement, alternate the direction of the ends or turn the face-framing pieces away from your face.
Spend a little extra time on the final few inches. That is where most of the movement comes from.

How to Use a Blow Dryer Brush on Different Hair Types
The basic method works across hair types, but you may need to adjust the heat, section size and drying time.
Fine or Thin Hair
Use a lower heat setting and keep styling products light. Put most of your effort into lifting the roots rather than repeatedly heating the lengths. Heavy products can quickly pull fine hair flat. At the crown, dry each section upward and let it cool before letting it fall.
Thick or Coarse Hair
Use smaller sections and dry each one completely before moving on. If your hair holds a lot of water, remove more moisture with a regular dryer first. Keep steady tension through the mid-lengths and ends, and slow down where the hair is thickest.
Curly or Frizz-Prone Hair
Detangle well and use sections small enough for the brush to stay in contact with all the hair. Smooth the roots first, then work slowly through the lengths. One slow, controlled pass usually leaves a smoother finish than several quick ones.
Short vs Long Hair
On short hair: Smaller sections give you more control and make it easier to reach the roots. Use short movements rather than wrapping too much hair around the barrel. Around bangs and face-framing pieces, lower the heat if needed and turn the brush toward or away from the face to create the shape you want.
On long hair: Long hair usually needs more sections so the barrel does not become overloaded. Dry the roots and mid-lengths first, then slow down as you shape the ends. Use clips to keep damp hair separate from finished sections to prevent tangling.
Can You Use a Blow Dryer Brush on Wet or Dry Hair?
Can You Use a Blow Dryer Brush on Wet Hair?
Yes. A blow dryer brush uses heated airflow, so it can dry and style damp hair at the same time. Always follow the instructions for your specific tool.
Towel-dried hair usually works better than dripping wet hair. Removing excess water first shortens the drying time and makes the hair easier to control. If your hair is very thick or slow to dry, use a regular dryer to remove some moisture before switching to the brush.
Can You Use a Blow Dryer Brush on Dry Hair?
Some blow dryer brushes can be used on dry hair for quick touch-ups, but check your tool's instructions first. For a full blowout, the tool is most useful on damp hair because it dries and shapes in one step. If you only want to refresh flat roots, reshape bangs or flip the ends, a thermal brush may be the better tool.
How to Use the TYMO VOLUMIZER PLUS Blow Dryer Brush
The TYMO VOLUMIZER PLUS is an upgraded one-step blow dryer brush designed for fuller volume, defined body and effortless styling straight from damp hair.
Use it the same way you would any round blow dryer brush:
- Start with detangled, damp hair.
- Apply heat protectant.
- Divide your hair into sections.
- Choose a heat and airflow setting that suits your hair.
- Place the brush under the roots.
- Lift the section for volume.
- Guide the brush slowly through the lengths, turning it as you move.
- Shape the ends inward, outward or straight.
- Finish drying the section before moving on.
- Let the hair cool before loosening the style.

TYMO VOLUMIZER PLUS
Common Blow Dryer Brush Mistakes to Avoid
Small technique mistakes can make even a good blow dryer brush feel harder to use. Watch for these:
- Starting with hair that is too wet: Dripping-wet hair takes longer to style and keeps the hair under heat for longer. Remove excess water first.
- Using sections that are too large: Airflow cannot reach a thick section evenly. If the surface feels dry while the hair underneath is still damp, make the next section smaller.
- Moving too quickly: Moving quickly does not help if you have to repeat the same pass five times. Slow down enough to dry and shape the section properly.
- Not rotating the brush: Pulling the brush straight through can smooth the hair, but it will not create much shape or bounce. A gentle turn helps maintain tension and shape the ends.
- Leaving sections slightly damp: Even a little leftover moisture can undo the shape. Hair that is still damp can frizz or fall flat as it finishes drying.
- Pulling every section downward: If you want volume, lift the roots away from the scalp before moving through the lengths.
- Using more heat than you need: Higher heat does not guarantee a better result. Use the lowest setting that works, and stop heating a section once it is dry.
- Skipping heat protection: A dryer brush is still a heated tool. Apply heat protectant first and follow the manufacturer's instructions.
The Takeaway: Slow Down and Work in Sections
Using a blow dryer brush comes down to four things: how damp your hair is, the size of each section, the tension you create and the direction you move the brush.
Start with damp hair, work in sections and lift at the roots. Move slowly enough to dry each section, then turn the brush at the ends to create the shape you want.
Once you get those basics down, a smooth, bouncy blowout becomes much easier to recreate at home.
Ready to give it a try?
Frequently Asked Questions
How do you use a blow dryer brush correctly?
Begin with damp, detangled hair and heat protectant. Work in small sections, lift the brush at the roots and guide it slowly through the lengths with gentle tension. Turn the barrel at the ends for shape, and make sure each section is dry before releasing it.
How wet should your hair be before using a blow dryer brush?
Aim for damp, towel-dried hair rather than dripping wet hair. If your hair is thick, long or slow to dry, remove more moisture with a towel or rough-dry with a blow dryer first.
Should I rough-dry my hair before using a blowout brush?
Yes, especially if your hair is very wet, thick or slow to dry. Rough-drying cuts down the time each section spends under heat and makes the hair much easier to style.
How do you use a blow dryer brush without frizz?
Use smaller sections, steady tension and slow passes. Make sure each section is fully dry before releasing it, and avoid using more heat than you need.
How do you get volume with a blow dryer brush?
Place the brush under the roots and lift the hair up or against the direction it naturally falls. Dry the roots in that raised position before moving through the lengths.
Can you use a blow dryer brush on dry hair?
Check your tool's instructions first. Some dryer brushes work for light touch-ups on dry hair, but a dedicated thermal brush is usually easier and more effective for refreshing volume, bangs or ends.
Can a blow dryer brush straighten hair?
Yes. With steady tension, a blow dryer brush can smooth and straighten the hair while it dries. The finish is usually softer, rounder and full of body rather than the pin-straight result of a flat iron.
Is a hot air brush the same as a blow dryer brush?
Usually, yes. Both terms describe a styling brush that blows heated air to dry and shape the hair simultaneously, although specific barrel dimensions and airflow power vary between models.
How do I make my blowout last longer?
Dry every section completely, let the hair cool in its finished shape and avoid heavy oils that weigh down the volume. A blast of cool air or a light-hold texturizing spray will help lock the style in place.


